How To: Highlighting Using Decoloring Cream
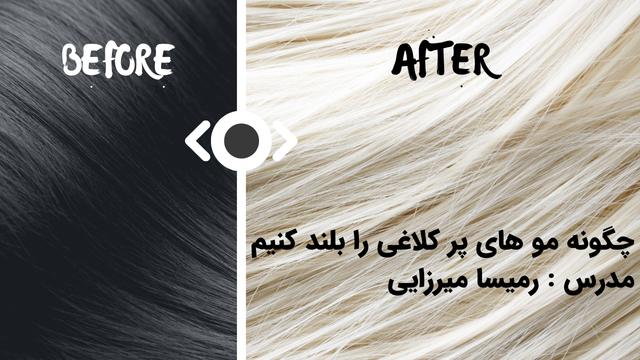
In this tutorial, you’ll learn how to Ombre hair using Val var’s decoloring cream using three different methods. To order Val var material, please contact , and to join our classes, please contact us at .
Instructions:
Greetings. I’m Anousha Shafi’e. Before we start, I want to wish you all a happy new year and thank you for your trust in Val var products. Today I want to use Val var’s decoloring cream to teach you a technique called color combination.
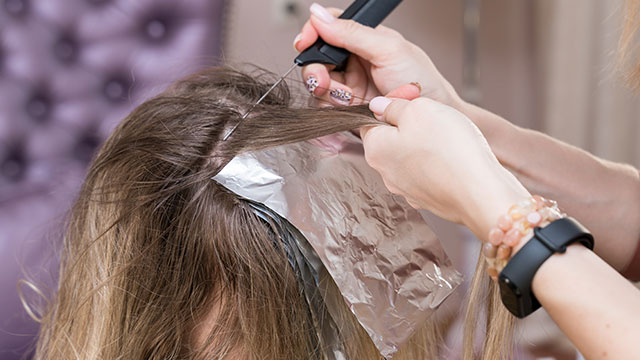
Unfortunately, Ombre is not yet a popular dye technique. The clients usually don’t like it when they brush their hair backward and realize there is no dye on the roots. The technique I want to teach you today will solve this problem. You can separate the client’s hair and start working from the side, close to the ears. Choose thin layers and after applying the product, wrap the layer in foil.
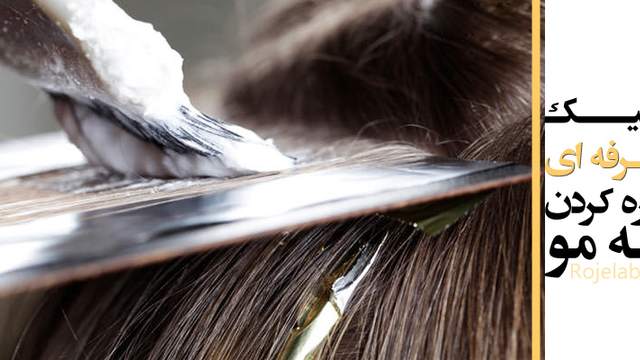
One of the main advantages of using decoloring cream is that after it’s mixed with an oxidant, there is no foaming. It contains Cetyl alcohol, which is one of the different types of fatty alcohol. It also contains fatty acids and fatty oils. The other advantage over using powders is that it will not cream dust when it’s being mixed with the oxidant. It will not move on your foil and will not cause leakage.
I’ve separated a thin layer of hair and put it on my foil. I add the product to the stem first, a few millimeters away from the glue on the tip of the foil. Add the product vertically to the hair until you reach the end of the stem. When you’re adding the product to the hair layers, make sure to use your brush to open the hair and make sure the formula reaches all parts of the hair. Try to widen the hair on the foil and spread it there using your brush. The wider and thinner the layer, the sooner you will reach your required bleach and hair will be less damaged. Put another layer of foil on top of the one you already have and wrap it by folding the edges.
Separate one layer and let it free. How many layers of hair with a natural color you put aside depends on what the client wants. If they want more highlights, you will choose fewer layers of hair to put aside. Let’s choose another layer and add the product. However, this time we’re going to use a different method. Put the hair on the palette and start adding the color from where you want to add the highlight. If you want the highlight to be more, put the palette a little closer to the root. I have to hold my hand a little higher so the camera and see me, but you should hold your as low as you can. To add the product on the side of the layer use your brush this way and try to fade the color in the middle of the layer. Add some of the formulae on the sides of the layer, where the client wants.
We’re going to use foam layers here. Since foam paper generates less heat compared to foil, this layer of hair might not be as bleached as the other layers. You’ll end up with different levels of bleach at the end. Add another level of foam paper on the top. Foam papers usually stick together easily and there’s no need to use hair clips. Pick another layer to put aside. Compare it to the previous layer to make sure they are of the same volume.
Now separate another layer for your highlight. Here we want to use teasing as our technique. If the client wants the bottom of the stem to have a highlight, you should only tease the hair to that point. However, if the client wants the highlights to start closer to the root, you can tease the hair this way. You can even use your finger to achieve this point. This will give the hair a waterfall effect. If you have more hair, you can use four fingers instead of three to create that waterfall. Put the hair on a piece of foil and start adding the product to the hair using Val var’s decoloring cream. The most common problem people have with Ombre using teasing method is that they form a line at the point where the highlight is added. If you use the side of your brush, this problem will be solved. More importantly, most people who work with formula aren’t very familiar with teasing and the hair opens when they’re applying the product and the result is a half-light and you’ll see the line where the highlight starts. After the product is added, wrap the foil from both sides.
We’re going to continue using these methods to the top of the head. For the back of the head, it’s better to separate the hair in a V shape. This will make the highlights look much better. As I said, for the back you have to separate the hair in a V shape. If the client wants to have highlighted below the batch, you can separate a layer in zigzag, or waterfall form and put in foil. The next layer will hang free. You will continue, just as we did for the side until you reach the crown of the head. For the top, it’s much better to use Meche and waterfall effects. This way when the client unwraps her hair, they will have three highlights on the crown.
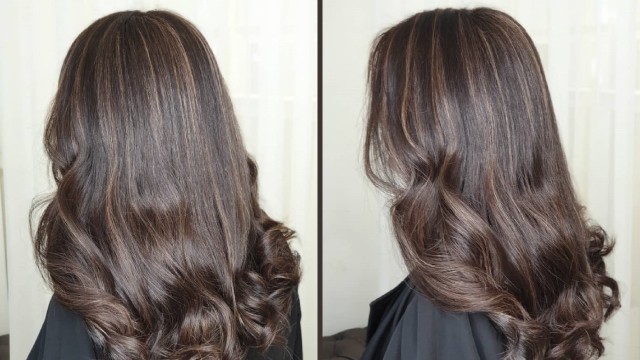
After the hair has reached it’s intended level, rinse the hair. As you can see, there are multiple colors used in this highlight. I’ve used Val var color mixes such as honey color number 7, and tobacco color. This will give the work a special beauty and I hope you have enjoyed this work. I hope you can see that I’ve added the highlight a little closer to the root in front and used tobacco color. I’ve also used tobacco color for the top of the head. If the client preferred not to have a highlight on the top of the head, you can start a little lower. I’ve used honey color for some parts of the hair, and oak color for some other parts. When the client brushes her hair back, you’ll notice that there’s a little highlight added to the root and the rest is on the stem.
If you’re interested in using Val var’s products or would like to join our classes, please contact us using the numbers provided in the description.