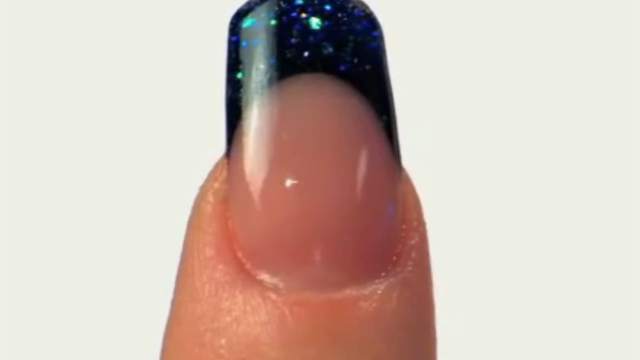
How To: Baby Boomer Nail Design
In this video, we will show you how to design a beautiful baby boomer nail. This video was provided by Kimia Beauty Salon. To join our professional workshops, please contact us at the numbers provided in the video.
Instructions:
Greetings. I am Niki Honarmand. I am a nail designer from Kimia Beauty Salon. Today I want to talk to you about baby boomer nail designs.
To start our design, we have to begin with a dry manicure or what is known as a Russian manicure. For this, we can use a thin scrub tip, which is essential for what we have in mind, and you will be able to perform a perfect manicure using these tips. I tried to perform the manicure in a way that pushes the cuticles back to provide us with more space to apply our material on the nail. Let’s use a bigger scrub to perform the rest of the process.
The next step is choosing the right tip to attach to the nail and we will choose the tip based on the size of our client’s nail. An important factor to pay attention to is the hollow point behind the tip. The bigger the hollow point the higher the quality of the tip will be. This will provide you with enough space to attach the tip to the surface of the nail. Apply enough glue to the hollow point behind the tip. We should make sure that the tip is level with the tip of the nail and the nail is not elevated or pushed down when being attached to the surface of the nail. Wait for five to ten seconds for the glue to harden a bit and make sure there are no bubbles under the nail tip.
When the tip is fixed in place, we can move on to work on the surface of the tip to get it ready for the application of the material. To remove the line of the tip we can use line-out or a simple paper scrub to correct the elevated nail tip. Now we should use our electric scrub to scratch the surface of the tip and remove the shine. After removing the shine from the surface, we can use a nail cutter to cut the nail to the preferred size our client has agreed to before. When cutting the tip, you should make sure that the cutter is completely in line with the tip and it is not lower or higher than the tip itself, otherwise, the tip will be damaged.
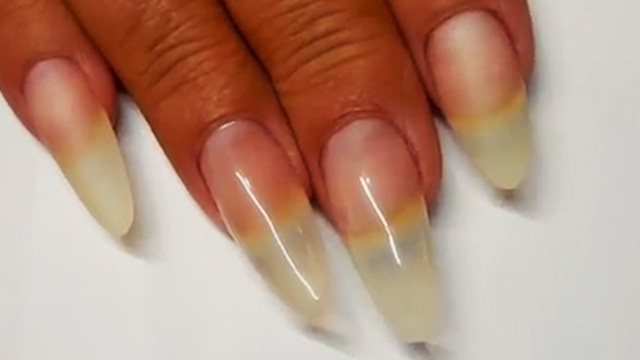
Before we can start putting the material on the surface of the nail, we have to shape the nail roughly to the shape and angle we have in mind for the design. I want a vase design and the tip plays an important part in the final design of the nail and in some sense acts as a blueprint for our final design. I will try to form the tip a little in accordance with the design I have in mind. For this tip, it is better to have an inverted V shape. We do not have to shape the tip completely. Here we just want a rough estimate of what the tip should look like, and at the end,
We can scrub the tip enough to make it look exactly as we need it to be.
After scrubbing the tip a little, I will use an anti-fungus and dehydration fluid to remove the oil from the nail surface. Apply it all over the surface of the nail and wait for three seconds for it to dry. Let’s use a primer for the next step. As you well know, there are two types of primers. An acidic type and a non-acidic type, which you will have to choose based on the nails you are working on, and the material you want to use. I will apply my primer all across the nail and try to make sure that the primer has covered the entire surface because it will help with applying the rest of the material and act as an adhesive.
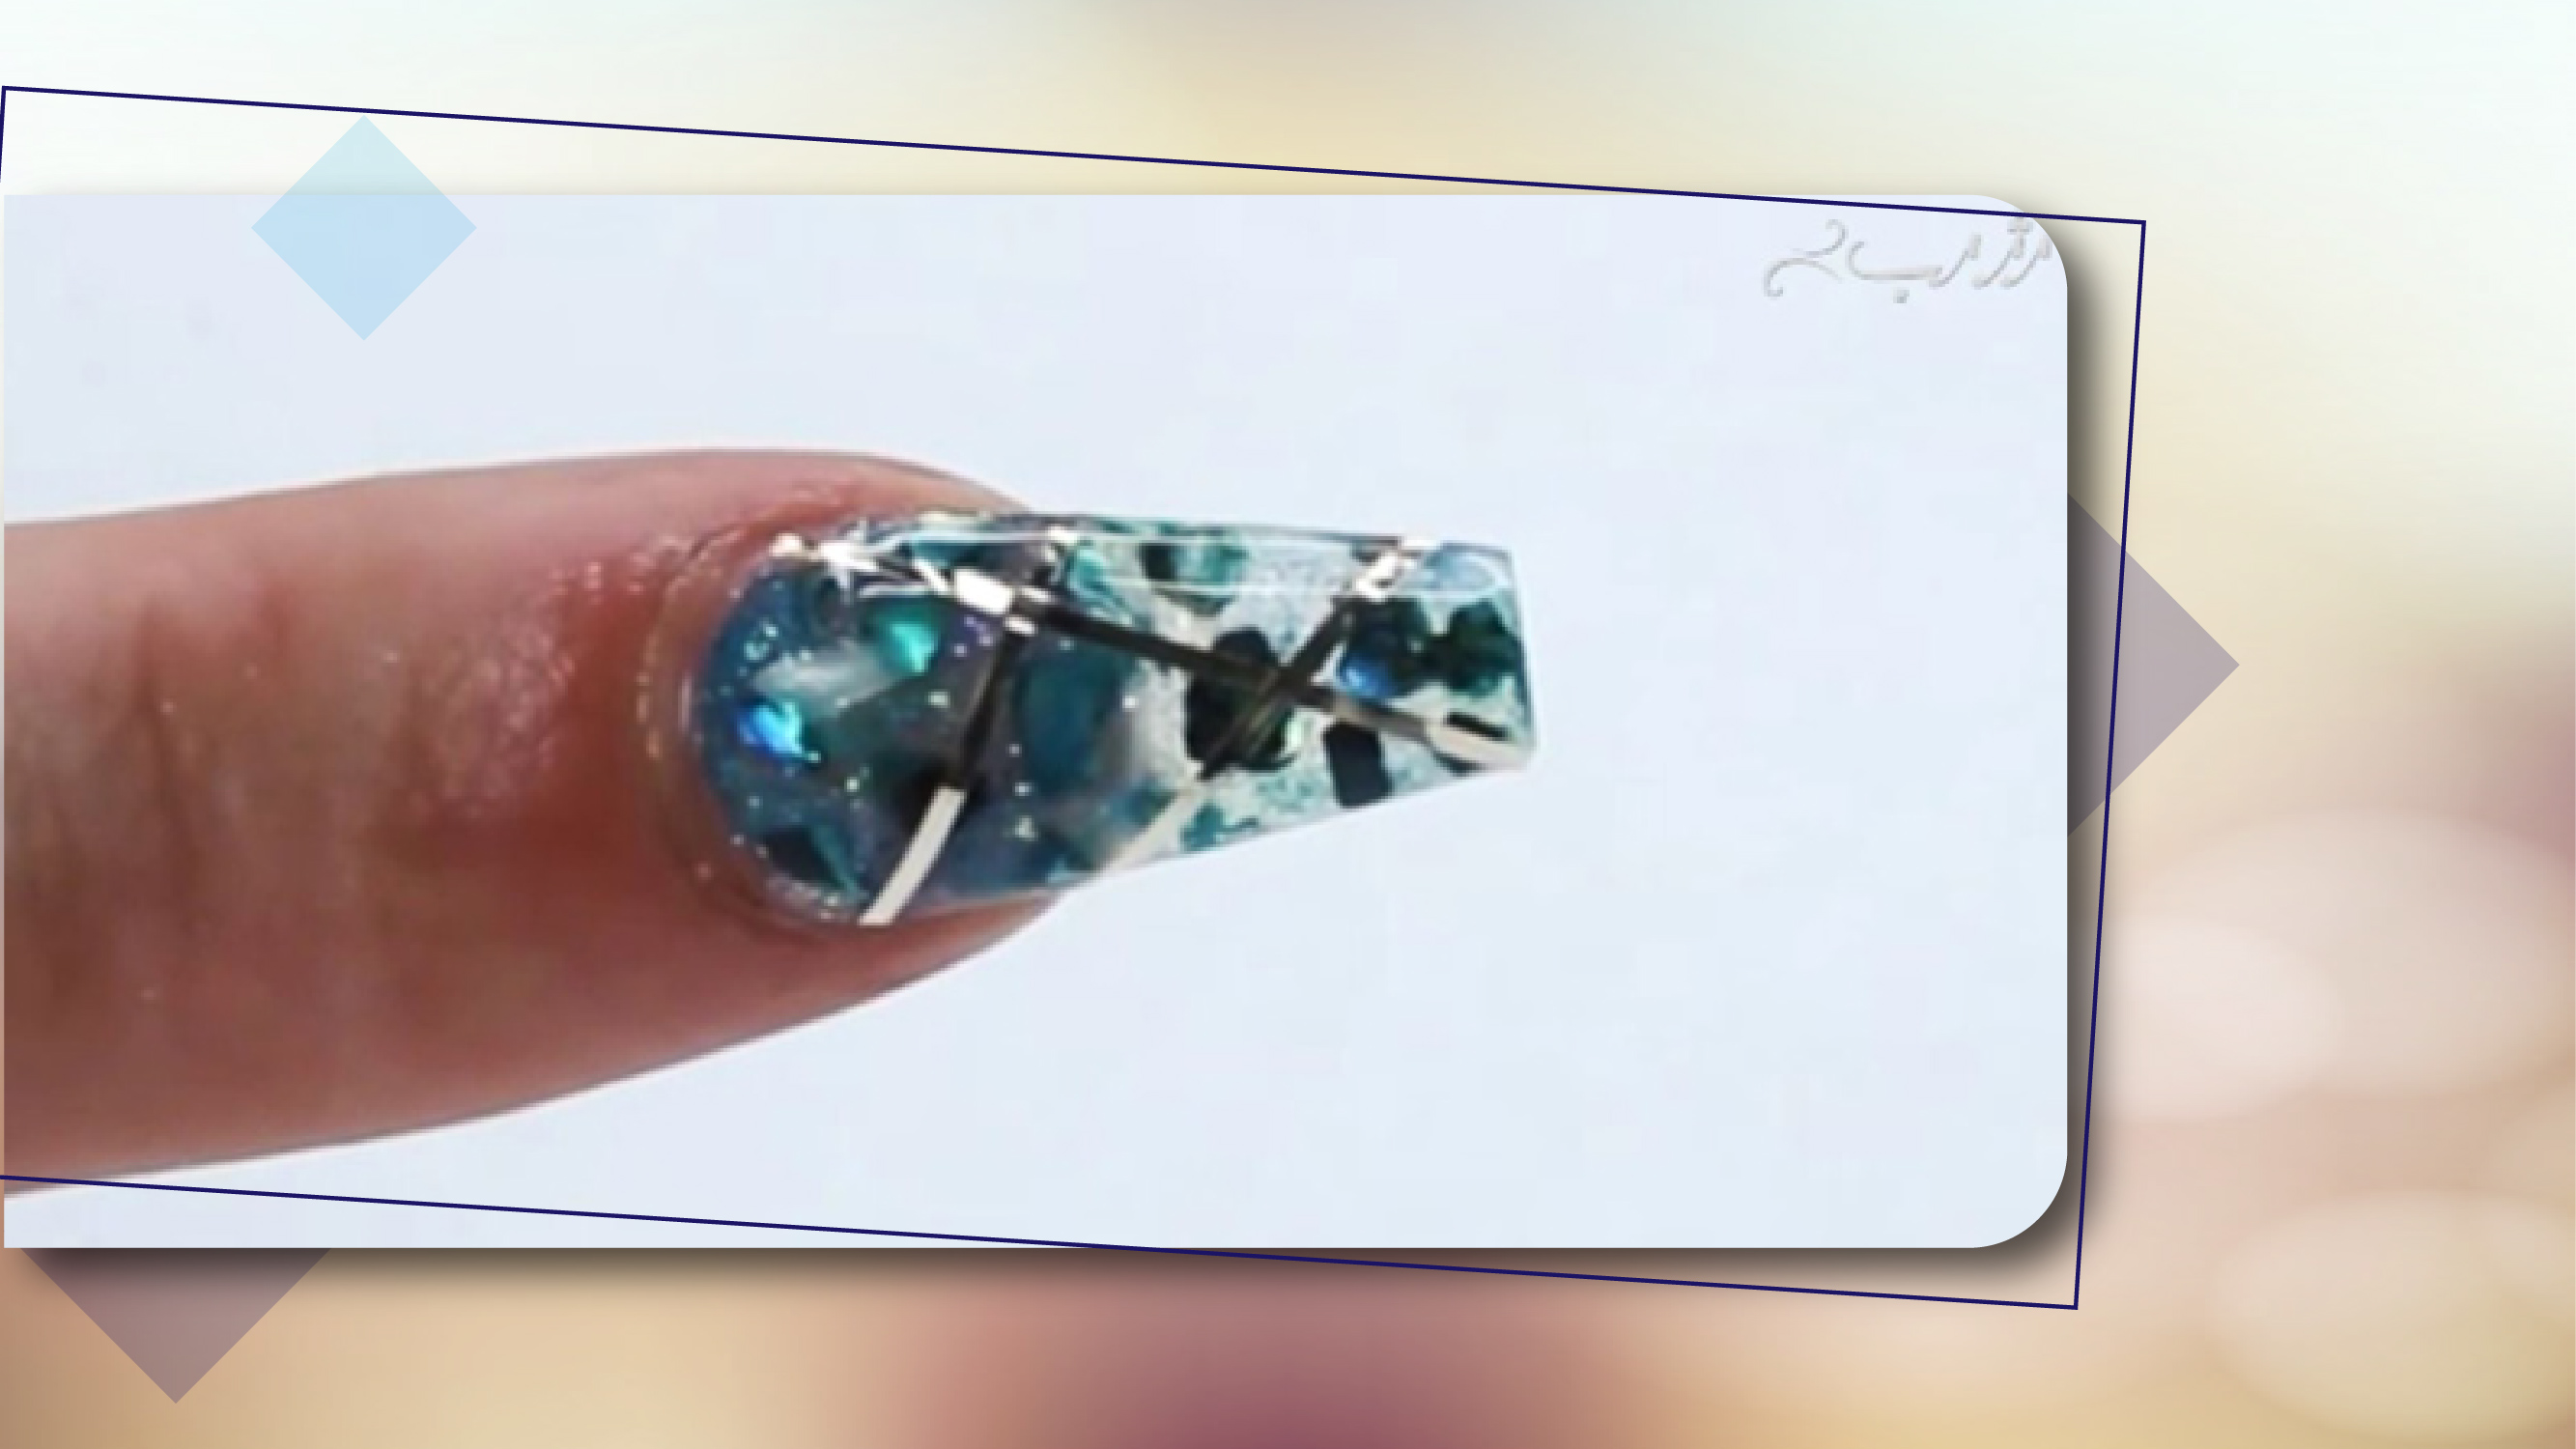
I will dip my brush in the liquid and remove the excess with the side of the bowl. Now that the brush is a little wet, I can dip it in my powder. Some of the powder will stick to the tip of the brush. Now let’s put the material on the tip of the nail and apply it upward. Now to apply the material to the middle of the nail, let’s dip the brush in the material again and pick some peachy liquid powder. Tap the nail with your brush to form it. Hand pressure is very important in forming an even surface and distributing the material across the nail correctly. Since we should never have a shadow on the nail when designing baby boomers, I will cover the surface with a layer of clear material to help preserve the design longer.
We use the brush to tap the nail constantly and rarely move the material directly across the nail. This concludes the process of applying material across the nail to form our baby boomer naildesign. Please stay with us while we show you the steps to scrubbing this beautiful design. First, let’s remove the excess material from the borders of the nail and then move on to a very gentle scrub across the nail while being very careful not to scratch the material too deep. It’s very important to use the scrub with correct movements starting from one side to another with equal pressure and making sure you don’t leave the nail’s surface with different levels of elevation because as you all know, you should never let the nail’s surface get uneven.
Hold your scrub aligned with the free side of the nail and make sure you do not exert any pressure on the upper portions of the nail. You should move the scrub back and forth across the nail. For those of you who are beginners in naildesign, a good way is to keep count of the number of passes you make on each side, so you can scrub both sides evenly. The more you move your hand inward, the edge you make on the side of the nail will be sharper. The more you curve your hand toward the tip of the nail, the edge of the tip will get sharper and you will end up with a vase-shaped design. For this part, let the hand down and work with the scrub with movements towards yourself. Use your electric scrub again to scrub the surface a bit.
When you get close to the cuticles, use your other thumb to pull the cuticle back in order to prevent the scrub from touching the tissue and hurting your client. When the scrubbing process is over, clean the dust with a brush and then use a cleanser to remove any remaining residue to make sure the surface of the nail is clean and devoid of any small particles. Now we can apply a thin layer of top shine. To do this, pick enough of the material with the brush, place the brush on the top one-third of the nail and touch the nail in one point for a few seconds before moving the brush down towards the tip. It is very important to apply the top shine to the tip of the nail as well. This will help prevent the material on the nail from cracking and increase the durability of the design.
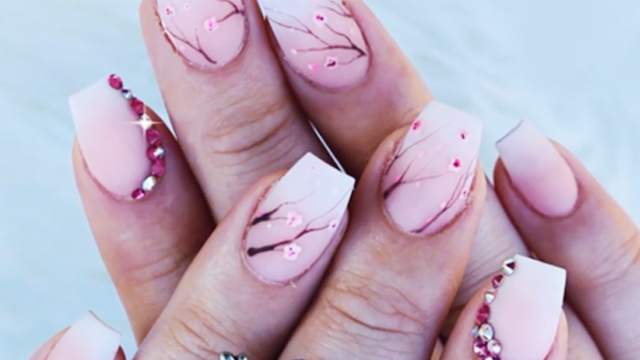
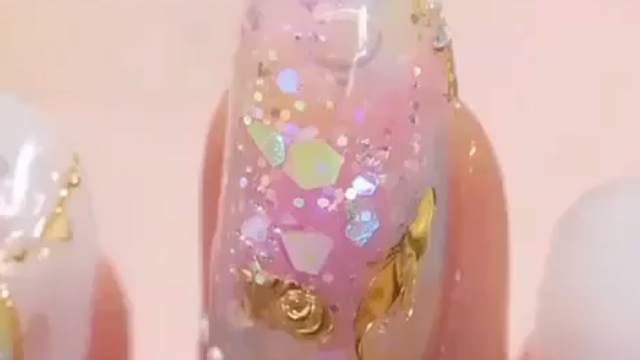
After applying the top shine, we will put the nail under LED light for sixty seconds. To make the design even more beautiful, you can use decorative material such as jewels. The jewels I am using here are the Swarovski brand and I am using a special pencil to pick them up. The pencil I am using contains a little wax, like what you have in candles, which will make your work easier. Using this pencil, you can position the jewels on the nail faster. You can apply a bit more top shine to make sure the jewels do not fall off the surface after a short time. Now let’s attach the next line of jewels to the nail. We never use glue to attach the jewels because it will make the nail look ugly and can cause white flakes around the jewels as well.
After attaching the jewels, we will put the nail under LED light for sixty seconds to fix them. After the allotted time, we will remove the hand from the LED device and apply cuticle oil around the nail. These types of oil are available at the market with different essences and you can use them to reduce and prevent irritation or inflammation on the tissue around the nail. Thank you for watching and please stay with us for our future videos from Kimia Beauty Salon. To join our professional workshops, please use the numbers provided in the video to reserve your sits and sign up.