How To: Eyebrow Micro-Blading Hachure
In this tutorial, you’ll learn more about the process of micro-blading. This video was provided by Mrs. Nastaran Khorshidi. To book our services, or to join our classes, please contact us at 09196184716.
Instructions:
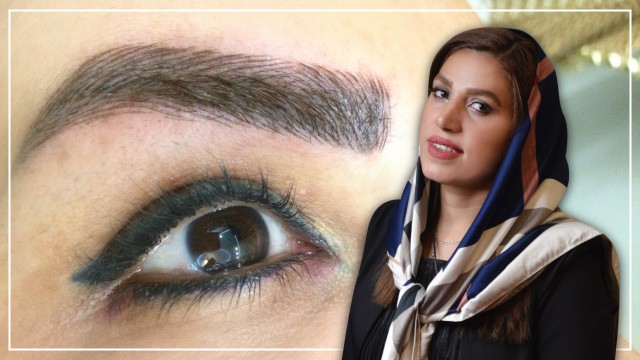
Greetings. I’m Nastaran Khorshidi. I’m a micro-pigmentation and micro-blading artist and instructor. I’m here today with Rojelab.net with an eyebrow micro-blading tutorial.
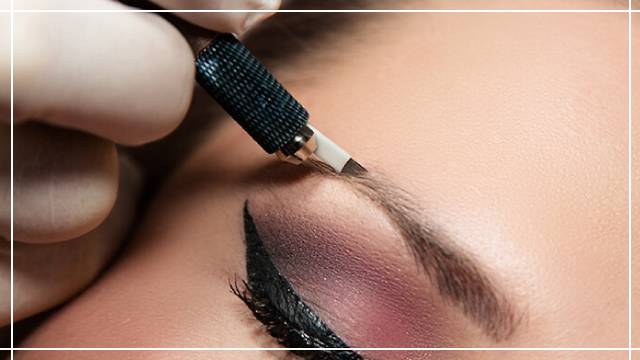
First, let’s draw the symmetry line between the two eyebrows using our calipers or divider ruler and draw the other lines. We have to designate the second and third points on the eyebrow. So first, we have to draw the symmetry line and then use the divider ruler to find the three main points on the eyebrow. The second point is between the first and the third point in the middle of the eyebrow and signifies the point where the hair starts growing downward from the top to the bottom of the eyebrow.
The fourth point is the continuation of the eyebrow. Between the first and the third point, right below the second point, you have the fifth point. We check the eyebrow for symmetry and then use a surgical pen to draw over the design to make sure it doesn’t fade away. This is important because some of my students don’t use the pen, then miss the lines during the process, and cause asymmetry in the design. To prevent asymmetry we use the surgical pen to put dots all across the design and wait for the ink to dry and then start working.
After dotting the lines, we can use our anesthetic, and then we can start the micro-blading process after fifteen to twenty minutes. You should use the surgical pen like this and apply small dots, which won’t be obvious on the eyebrow. Place the dots in with equal distance from one another. We mix the ink for the process based on the client’s skin color. As we know, for colder skin types which usually have grayish or brunette color we must use warm colors, which contain the warm color of pigments to neutralize the cold skin color. We choose the color based on the color of the client’s skin and start the micro-blading process.
We shouldn’t curve the lines for the crown of the eyebrow. We’ll continue the process until we reach the second point on the eyebrow which has a different direction of hair growth. The direction of hair growth on the second point on the eyebrow is the opposite of the first point. Therefore, if the direction of growth is upward for the first point, on the second point this direction will be downward and opposite the first point. During micro-blading and micro-pigmentation, you should never have severe or sustained bleeding, but you will see a small plasma discharge nonetheless.
As you can see during our micro-blading process in this tutorial, there is no bleeding and even very little plasma discharge. Keep in mind that the more bleeding there is, the less there is the possibility of pigments entering the skin. Our hand pressure must be very slight, and the hand must be held in a vertical position. After drawing the lines using the micro-blading tool, we apply the ink directly on the eyebrow and let it remain to help the skin absorb the ink easier. The space between two lines should be no more than the diameter of a hair strand.
I hope you have enjoyed this tutorial.