How To: Hair Contouring Step-By-Step
Hair contouring is a technique in which the hair is enhanced in colour or highlights. To get started, separate the hair around the head to form a circle and tie the hair on the top with a pin. Tease the separated hair well in the roots. This is for fading the boundary colour lines on the hair. Place a piece of foil under the hair bunches and apply the material below the teased parts.
Keep in mind to put some colour on the foils before placing them under the hair. This way the foil is held fixed on place while sweeping the brush on the hair and is unlikely to spill any material.
You can watch a full instruction of this technique in a tutorial below.
To sign up for the courses presented by Ms. Bahri, please dial the provided phone numbers.
Instructions:
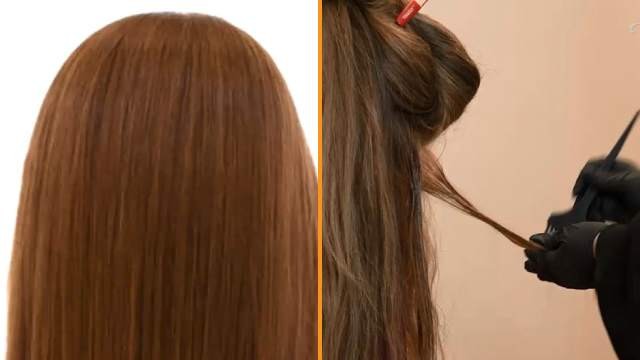
Hello everyone, I'm Bahri, a make-up formula expert. Today we're gonna teach you the hair contouring technique. as you have probably heard before, make-up contouring means skin highlighting and shading. but contouring is also applied for hair. it is for lighting or making the hair look brighter or darker. so we'll show you one of the contouring techniques on this mannequin here. first we should separate the hair from one ear to another to form a circle . Then hang down a 1 cm thick bunch of hair around it. and wrap it in a piece of foil. now we tease the hair, that we have separated, in the root. in the root. we'll tease the hair and make what remains straight prepared for bleaching. We don't want the teased part to be bleached, cause as you might be aware, in new make-up techniques the hair is no longer bleached in the roots. so we tease the hair to fade the colour boundary lines on the hair, then bleach the hair below the teased part. apply the material on the hair below the tease like this.
Generally for the clients with long hair, you better not fold the foil in the middle like this. I've seen so many artists double fold the foil. but if the foil is folded this way, it will get heat up and therefore damages the hair. that's why we say it's better to avoid folding it into a cushion-like shape. to prevent the foil from warming up. so just try to make a double vertical fold like this for long hair. so that the hair is protected against heat damages. we'll do the very same for the next bunch of hair. tease it, then apply the material. note that when applying the material on the foil, it will stick to the hair with just a single sweep. most women have trouble with the foil sliding off the hair. but once we have swept the brush on the hair, it sticks to the foil and doesn't fall down. well, we've wrapped in foil the whole layer we had separated . and we have one more layer to wrap in foil, so there are 2 layers for us to foil and apply material. in a way that it's teased in the root and the material is applied to the rest.
It means we'll have two round layers, now I'm separating the second layer. I'll apply the material on this one the same as the first one. well, we've now separated and foiled 2 layers around the head on the bottom. We carry on separating hair but no longer like the previous ones around the head and the hair is partly wrapped in foil. do it the way I'm gonna show you. separate a bunch from the top. Then take 3 other big parts out of it like this. and hang downwards what's left. so we took 3 parts, each 1 cm thick or more. and now start teasing the 3 parts together. like this. but we'll leave the one we hanged downwards alone, it will then remain in dark colour among the rest. we'll keep doing the same till the end of the treatment. which means taking 3 parts of hair out of a bunch in a zigzag way and hanging what's left downwards to be free among the rest. Then tease those 3 parts and carry on this procedure till we reach the top of the head. make sure the hair bunches are straight and without unevenness. again we separated 3 big parts and let the rest go free.
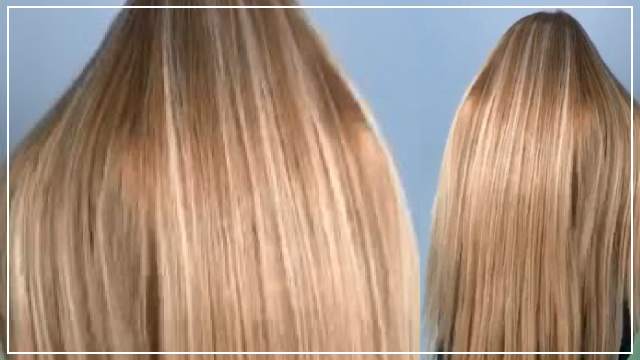
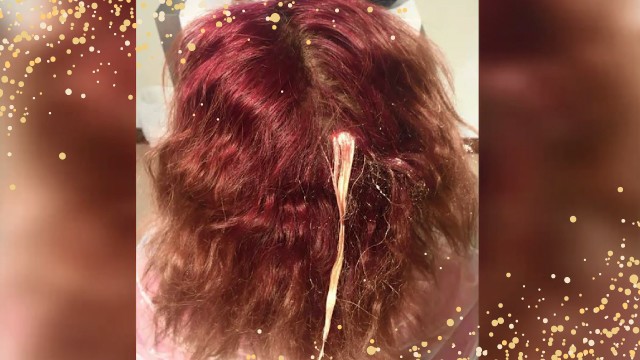
So, after completing the first two layers around the head, from the third layer on we won't put the entire bunch in the foil. as I already showed you and will show you again. we'll separate a big bunch of hair, then take 3 big parts out of it in a zigzag way. 3 big parts in this way. and hang the rest downwards. Then tease those 3 parts together. Then wrap them in foil and apply the material. we'll carry on making these zigzag partings and teasing around the head till we reach the top center of the head. in the last step, we'll take the required pauses for the treated parts of the hair to reach our desired base in colour. and start checking the hair from the first foil to the last one. make sure that the hair in the foils are all in the same colour base. I've seen some artists fold all the foils, take a pause and then wash them all together. This is an incorrect way, because the first foil you made, has stayed for a longer period of time than the last one . and that's why in some treatments, some parts are too white, some are creamy and some are relatively yellow in colour. and the hair is not in a uniform colour base. so the best way to make the entire hair have an equal base. is that you start wiping the foils one by one from the first one so they can be all set to a single uniform base. For example if you wish to have a number 9 or 8 base, they can all reach that number respectively. as long as your client's hair is resistant to damages and elongation, you are able to take the required pause. after you have wiped and removed all the foils, you can wash the client's hair. certainly, we have to use a shampoo to thoroughly clear the bleaching material off the hair. after shampooing the hair, you can use rinsage material suitable to your hair colour base. it means if you have an 8 or 9 colour base, you can use the respective rinsage materials in combined or individual forms depending on your taste. and provide the desired colour for the clients. as you already know, this is mannequin's hair and is not able to receive much colour. so we'll show you a model for the final treatment result at the end of the video. Thanks a lot for your time and watching us. I hope you've found it informative. I'll be glad to see you in my training classes. To enroll in the classes, please dial the available numbers. see you again soon.