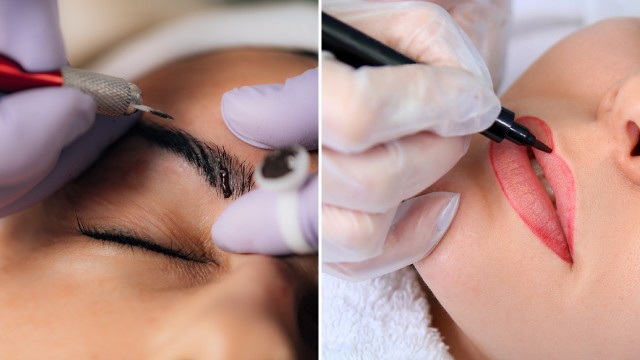
Micro-Scalp Pigmentation Explained
In this tutorial, you’ll see a presentation of micro-scalp pigmentation or hachure. This video is provided by Faezeh Jafari skin and hair clinic. To join our classes or receive our services, please contact us at .
Instructions:
Greeting. I’m Faezeh Jafari, micro-pigmentation expert from Faezeh Jafari Skin and hair clinic. One of the new techniques in micro-pigmentation is micro-scalp that has attracted a lot of following recently. You can learn or receive our services based on this method in our center.
Greetings. I’m Sahar Rahimi, a micro-pigmentation expert. Today I want to show you a micro-scalp pigmentation in action. We will show you a set of methods used in micro-scalp.
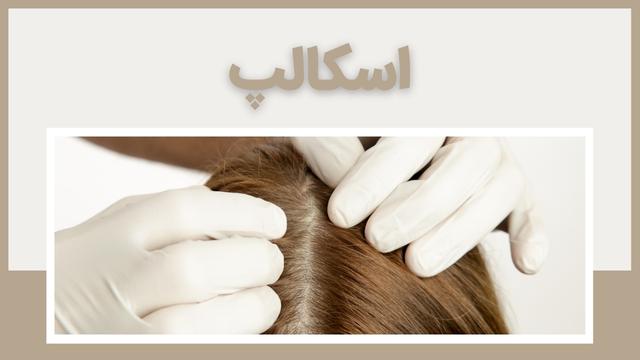
The scalp is the area of the head starting from the hair growth line above the forehead and ending at the back of the head above the neck. Hair growth happens on the outermost layer of the scalp. Micro-scalp is the medical branch of micro-pigmentation. In this method, the pigmentation expert tries to hide the hair growth defects of the client. These defects include local baldness or pattern baldness. It can also be used to hide scars after surgical operations, birthmarks, burn scars, or any other defect that the client might like to remedy.
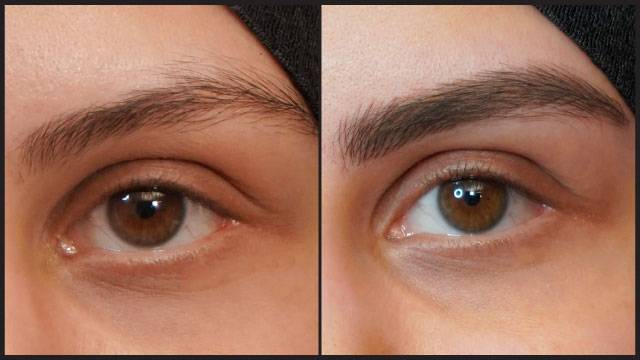
Our client here has a low hair volume across her head. We will use different micro-scalp methods to try to create optical illusions to add volume to the hair.
We have to have a clear understanding of the nature of the client’s skin type on the scalp. This will help us decide the best type of micro-pigmentationcolor for the client. If the client’s skin is dry, we have to use glycerin-based colors and if the scalp is oily,
We have to use water-alcohol based colors so we have the least amount of color loss after wash.
The next thing to decide is the color. We have to choose a color based on the client’s skin type. We should also take into account the color loss that happens after the client bathes after three days. The color should be chosen in a way that after this it gets closer to the natural haircolor of the client. Keep in mind that the color you choose will mix with the natural skin color of the client, and will change after application. Most often, the color changes toward grey and cold colors, which is very disappointing for the client. Therefore, the expert should be aware of color spectrums and choose the right color for the pigmentation.
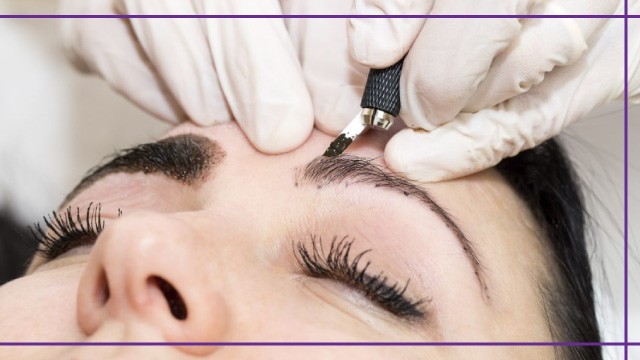
The most important point is the hand movement and angle. The scalp is a round area where the angle of your hand and cartridge is crucial. If this is not done correctly, you might see dark and light pigments in the area. It can also cause color diffusion and lack of pigmenting. Therefore hand pressure and angle of the hand is very important and can give you satisfactory results with a unified pigmentation very much like natural hair growth. If you apply too little hand pressure, you will have a major color loss. If you apply too much hand pressure, you will get dark pigmentations. While applying the pigmentation, every part of your hand should be fixed, other than the two fingers holding the cartridge. Because it can unbalance your hand movements. Use your hand as a foundation and move the fingers to touch the skin in a ninety-degree angle.
You have to give the color enough time to enter the skin. This has a crucial effect during the pigmentation process. A pigmentation done with this method can last up to ten years. The overall depth of penetration is decided based on the client’s skin type and its ability to accept pigmentation.
As we explained in the previous videos, after applying a few pigmentation points on the skin,
We have to clean it using a serum and decide on the skin’s ability to accept pigmentations. You can decide on the depth of penetration by studying the result of this test. Some skin types are thicker and you have to go deeper to be able to apply pigmentation.
You can apply anesthetics before and during the process to reduce pain. The correct angle of the cartridge during the process can also help with reducing the pain. We ask our clients not to worry about pain during the procedure because we make certain to take all the necessary steps to reduce any discomfort.
One of the main advantages of micro-scalp procedures, aside from its cosmetic value, is its medical prospects for the patient. When you apply this method on the skin, you’re stimulating the tissue. This stimulation will increase collagen levels on the area and improve tissue health. It’s also likely to help with improving hair growth. The pigmentation expert must pay attention to the natural hairline of the client. Not all hairlines are the same and you should apply the pigmentation is such a way to compliment the natural hairline. Some people have round hairlines and others have angled hairlines. You should always apply this method half a centimeters after the hairline begins. Also, keep in mind not to apply the hachures too close to each other because it will make the area look darker than the natural hairline would.
The previous technique, in which we apply pigmentation points on the scalp, is the best technique to use for people with decreased hair volume across the head. What you see here, is a blading technique that we will use to increase the efficiency of the work and give it more of a natural look. An expert must do the micro-blading procedure because too much hand pressure can cause colloide formation or hair loss at the area where the technique is applied. Low pressure will cause color loss after a wash. Therefore, it’s important to choose the right pigmentation expert. The pigmentation expert and the client must both be very careful about their choices during this process.
Another technique used in micro-scalp is using a micro roller to apply the pigmentation. In this technique, a number of needles are put together on a roller and when you use the roller on the area,
These needles will penetrate the skin at the same time and can speed up the process.
There are a few things to pay attention to after the micro-scalp process. Avoid taking a shower for three days. Don’t use a hairpiece or a hat after this process. Use Gentamicin or A&D vitamin ointment on the area. Don’t apply too much ointment because the scalp is usually oily by itself. Don’t use solar panels for tanning and avoid direct sunlight.
The average lifespan of this process depends largely on the color used, skin type, age, and environmental circumstances. The lifespan can be from one to ten years and you shouldn’t expect this process to be final and last forever.
I hope you have enjoyed this tutorial. Those of you who have hair fall issues, defects, or want to have the micro-scalp process done, can call us or come to our center for a one-on-one consultancy session. If you are a micro-pigmentation artist and want to learn this method, you can join our classes and workshops.