How To: Highlighting Caps & Foil Meche
Because of your frequent requests, in this video, we are going to talk about highlighting caps in combination with foil Meche and a few technics to produce better results. This video is done by Mrs. Anousha Shafi’I from Ostoureh beauty institute. If you are interested in learning more or require information please contact us by calling .
Instructions:
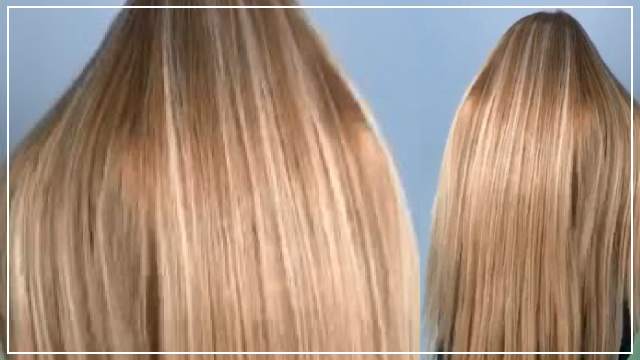
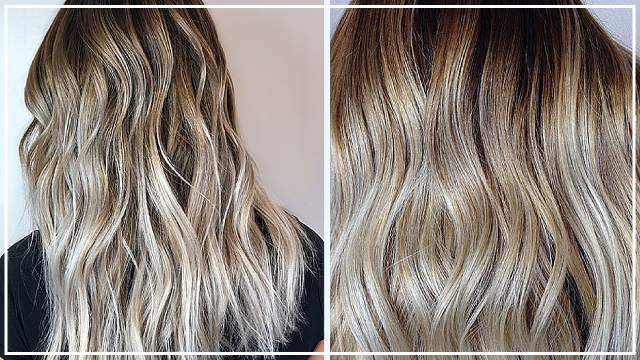
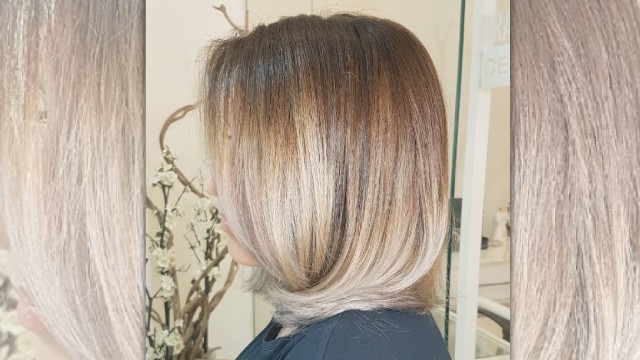
Greetings to all of you who are watching us on Rojelab.net right now. I’m Anousha Shafi’I, and today I want to talk about hair dye using highlighting caps and also foil Meche. It seems as if that this year there isn’t a high request for hair dyes using caps, but nevertheless, there might still be people who would like to work with caps and today we are going to show you how to use caps in combination with foil Meche.
Before we begin, we should definitely brush the costumer’s hair and the hair should be clean and straight. The notion that the client shouldn’t wash the hair before the process is an incorrect one. The client’s hair should be clean and straight before the process, otherwise, it will take longer for the dye to affect the hair and also you might not reach the desired haircolor. For a cap hair dye, you need a Meche plastic hair cover and a Meche hook. Keep in mind that you must pull at least one-third of the client’s hair out of the cap.
You brush the client’s hair back and ask them to put their hand on their hair to keep the hair in place. Then pull the plastic cover on and then put the cap on the hair. Add some baby powder inside the cap so it can be pulled over the plastic cover with ease. We have to know whether the customer is looking for an ample Meche or a sparse one. We have to specify the space between each batch of hair. If we are looking for an ample Meche, then the space between the batches should be closer.
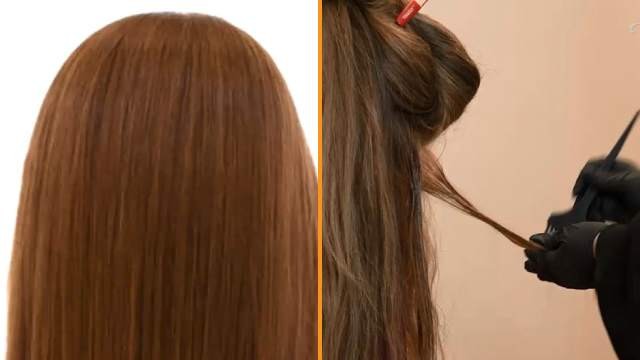
Some clients rather start the Meche from the base of the hair and to leave the front part alone. If that’s the case, you can exclude some of the hair on the front before putting the cover on. You have to make the first hole on the cap on the line corresponding to the nose. The second one can be to the left and to the right with a little space between them and go around the head like that. Where ever you make the two holes next to each other, you have to make another hole above the two and in the middle of them, so the three holes will look like a triangle. When making the hole to pull the hair batch out of the cap, you have to be careful not to penetrate so much so that you’ll injure the client’s scalp. However, the depth to which the hook must go should be far enough for you to be able to pull the hair out of the cap from the root, and not just the stem. It will look very ugly if you perform the Meche only on the stem and leave the root out.
Put your hand on the cap and using the hook pull a batch of the client’s hair out of the cap like this. The next pull should be above the eyebrow arch. If the client prefers for the Meche on the front to be ample, then you can pull the hair out two by two on top of each other. The third hole you make to pull the hair is above and in the middle of the two first holes you made. It will look like a triangle.
An important part of the process is pulling the hair out of the cap around the ear. For this part, you must put your hand under the cap and cover the ear. Put the hook inside the cap above the ear and make sure to pull the hair out from the root. Because the two sides of the head must be included in the Meche. You will have to do the same for the other ear and behind the head. There should be three batches of hair at the back, to the left, right and on the line with the neck. After pulling all the hair out, brush the hair thoroughly with a comb, otherwise, some parts of the hair might be left inside the cap and after adding the dye, it might look like there’s a leak. You have to pull the batches a little using your hand, so if there’s some part of the hair left inside the cap, you can pull them out.
If you collect all the hair in one place and then proceed with the dye, it will create ammonia gas which can burn the hair. Collect each triangle or five batches into one place and dye that way to prevent burn.
Here I want to show you how to add the foil. After adding the dye and coupled every three or five batches of hair in one place, it’s better to use foil Meche. You might be asking why not use a coloring cap or hat. This is because foil causes the heat to distribute evenly. A coloring cap can cause perspiration and might ruin the process. To use the foil, just wrap it around the client’s head like this. After covering around the head, just cut the foil and roll up the top of the foil. After a few minutes, if you want to check to see if the dye has reached the level you want, you don’t have to uncover or remove the foil to check. Just use your hand to check if the foil is warm. If the foil is very warm, it means that you have to remove the foil, but if the foil is just slightly warm, keep it on until you reach the desired dye.
Some people like to use a blow dryer to achieve the desired effect. You have to keep in mind that if the blow dryer is pointed to a single place, that part of the hair will be damaged. Therefore, when using a blow dryer, keep moving your hand around the head to apply the heat all over the head. I personally don’t think you need to use a blow dryer when you’re using a foil. But in cases where the client’s body heat is low or when the hair is thick, you can use a mild heat applied using a blow dryer to achieve the desired results. After the dye is done, remove the foil and rinse the hair without removing the highlighting cap. You can then proceed with toning and massaging the hair. Next, remove the cap and plastic cover without washing the hair again. If you need to apply the toning formula again, you can still use the product left inside the highlighting cap.
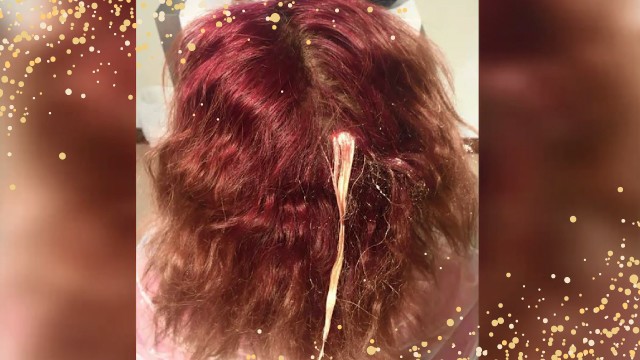
One of the reasons for leakage when using this technic could be that the holes you’ve made on the highlighting cover are too big. You have to ask the client to pull the cap tight from both sides as to prevent leakage. When you’re testing the hair for resistance, you shouldn’t pull the hair from the base like this. Hold the hair with both hands and pull it from the stem. This will prevent hair from being pulled out of the cap again and protect the roots.
If you need to apply the formula again, you don't have to wash the hair with the cap on. Washing the hair after toning could also cause leakage. In any case, if leakage did occur, you need to assess the color of the client’s hair, and using the tip of a brush add the color to the affected areas without using oxidant. Dry the product using a cotton swab in the direction of the root. Some people use a level 3 or 4 to cover leakage, but again this could depend on the color of the client’s hair. For example, if the base is red wine color, you can use the same to cover the leakage. It all depends on the color of the client's hair. After the toning is done, rinse the hair again and use a conditioner or mask.
I hope this tutorial has been useful in helping you design beautiful Meche and highlights. I also hope to see you in our private classes
Until next time, goodbye.