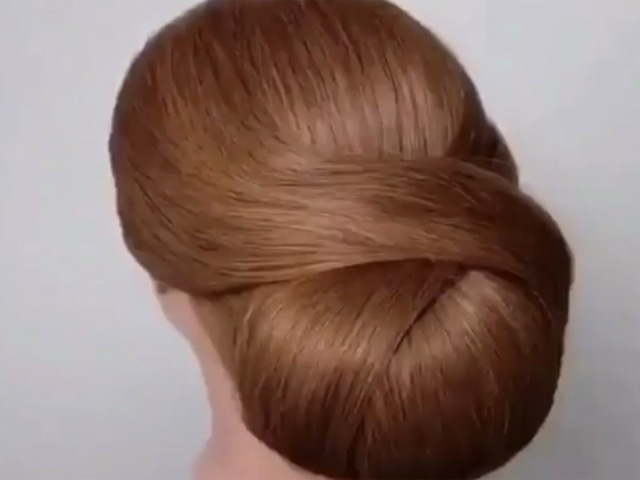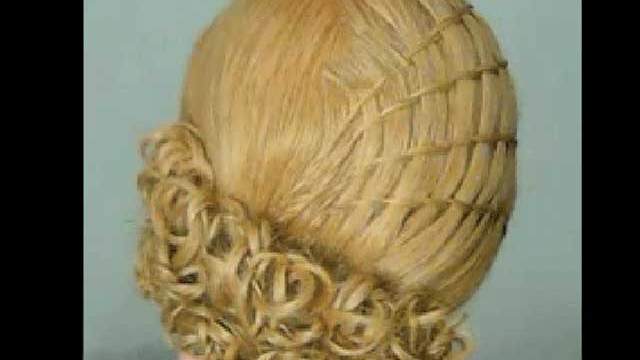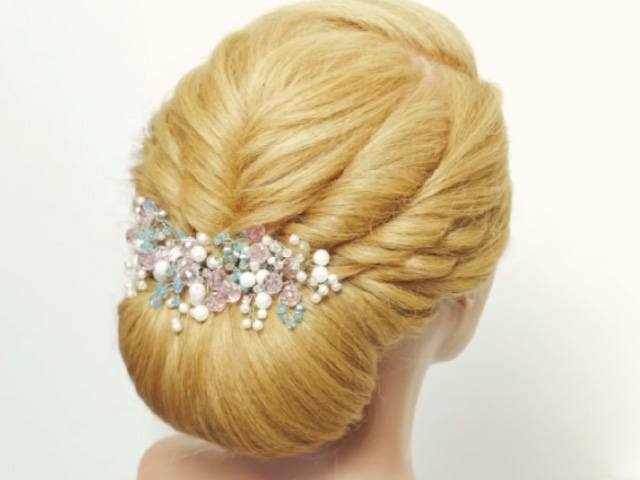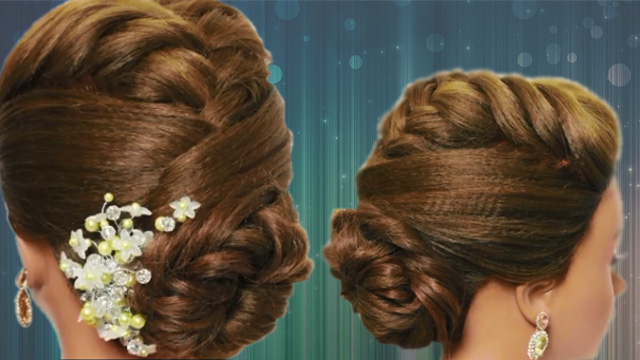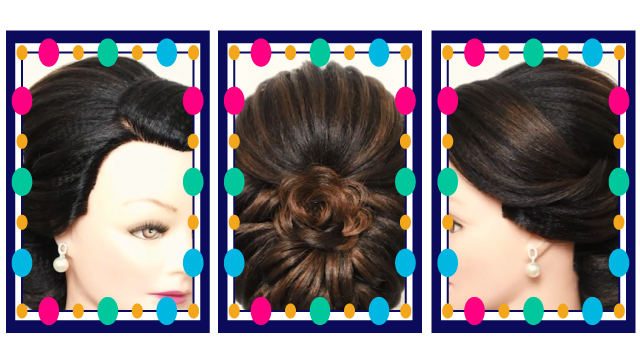
Mixed Chignon Step-by-Step
In this tutorial, we try to teach you a mixed chignon. This video was brought to you by Noghre Negar institute. This chignon is a combination of two different techniques and is very popular and beautiful.
Instructions:
Greetings. Today we’re going to teach you a mixed chignon. This chignon is a combination of weave and linear chignons.
For the starters, separate the hair on the model’s head from one ear to the other. Like this. Although, I’ve chosen a wider length of hair here since I want to split the hair to this side. This will help me. If you separate this much, from this ear to the other, it’ll be quite enough. I’ve separated a bit more to help the aesthetics of my work.
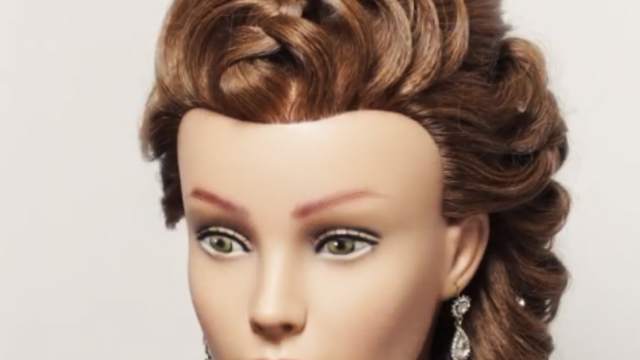
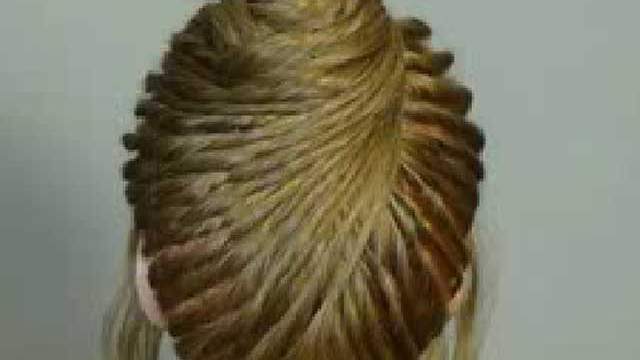
Now for the top. My model’s has teased hair on the top. But if you have a client or model with somewhat of an unusual hair, you can try to tease this part a little bit. I don’t see the need here. As I said before, you have to separate the hair like this on both sides identically. It should be in a line like this with a little diagonal part at the end. Back to the top. Separate the hair diagonally like this. Hold the hair like this. Separate a part equal to the one under it. This is the part we’re going to tease and use as the basis for our chignon. Let’s add some volume to this part so it doesn’t look flat. Let’s put this part away. You can use anything to hold the hair with. Use a hair band to hold this part. I use the hairband at the bottom because I want the base to be formed at the lower part. You can use two hairbands to make sure it will hold. I used the hairbands to wrap the hair right here at the bottom. I’m going add a hair prosthetic here with the same color as the hair itself. You have to do the same. Use pins to connect it to the hair. Since my model has light golden hair, I’ve used golden pins.
I don’t want this prosthetic to be too big or too small. I don’t want to add too much volume to the back of the head. I want to be almost this size. Just an ordinary prosthetic hair. Curve the part hanging from under the prosthetic like this. I try carefully to add a few lines to this part of the hair. I don’t want the lines to be deep since this is the basis for our chignon. To make my work look better, I’ve curled up the end of the braid after creating the lines, like this. This will make the work look better. But you can do this without adding this effect.
Now for the part on top of the head. As I told you before, you should tease the hair a little bit to prevent the hair from looking completely flat. We’ve already made the base four our chignon. So for this part, brush the hair gently first. Hold the hair in your hand and curve it slightly at this area here. Use a hairpin to hold the hair in place. Now I’ve fixed the part on the top using hairpins. Use a hair styling spray and create the lines I told you about but be careful not to flatten the hair. I’ve tried adding the volume using the lower layers of the hair here. I’ve left the surface intact in order to add the lines. Otherwise, this part could get a little frizzy and make the work harder for you.
We’ve fixed the part on top using hairpins. Exactly like what you see, above our prosthetic hair. For the split, which I’ve separated like this, I hold it in my hand and try to curve it. Let’s add a little cream first to prevent it from getting frizzy. There’s no need to add any other product. Look at my fingers. Do it like this. Add a little curve. I want the hair to preserve its style and curve. Hold your hand in place and fix the hair using a hairclip. After I’ve fixed the hair, I can use a small hairpin to add lines. I’m not going to remove them until the end of our chignon. Let’s use a little hair spray.
I’m going to work on the rest of the hair on this part. Very gently. Because it’s connected to the other batch. Let’s add a little bit of cream. Brush the hair and go like this. Like this. The same thing you did for the previous part. If you look carefully, you can see the lines appear by themselves. Add a few hairpins to help keep it like this. These lines will help the work look better. After adding the pins, you can use a clipper to help hold the hair. But be careful not to ruin it. Go slow and from above. I’m using a little spray to help fix the hair. Keep in mind to add the spray from a distance. Off to the next part.
Here, we’re still working on the hair on the side. This is the part I told you where I have separated a little extra hair to work with. The lines I’ve added here will help the chignon look better. The more hair we have to work on, the better the work will look at the end. Brush it gently and curve the hair exactly like this. With a curve, exactly like this. Fix the hair using hairpins. I won’t move my hands yet. Add a hair clipper. Use a little hair spray. After removing the pins, these lines will be visible. Now let’s move to the next part.
Separate a part of the hair, brush gently and curve it slowly. I can add a clipper to this part at the bottom and then add the lines. Like this. The hair should be straight. Since the hair is not fixed in place yet, we have to be extra careful. Add a little hair spray. The size of the lines should be the same everywhere. I can add the same lines to this part of the hair on the top.
For the part adjacent to the ear, we have to first brush and add a little hair cream. Like this. I try to create the lines at the same time I’m curving the hair. I add the pins. Very gently not to damage the base. Let’s add a little spray to the hair.
I’ve styled and curved the whole hair around the side and near the ear. This hair hanging here is the part which we left behind for later. Now we have to hold this part in our hand, like this. Curve it and add the lines at the same time. I’m adding the pins this way because if I don’t they might fall and cause trouble. These pins are temporary and will be removed at the end. Let’s use a little hair spray. Let’s style and clean our lines.
Let’s keep working on the end of the hair. Let’s curve it the same way. When you want to curve the hair, hold two fingers on the hair like this and curve it this way. Let’s add our pins here now. If you use the fixator and the cream the right way, the lines will develop by themselves and you won’t have any issues.
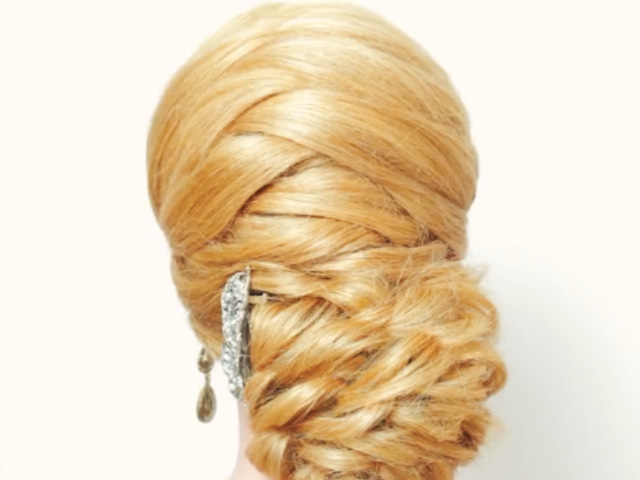
On to the final part of the hair. I’ve curved the hair and added the lines. Let’s move to the left side of the head. Separate one part like this. Separate this part diagonally. Add a little hair cream. Straighten it. I’ve separated this part diagonally and added some cream. Don’t separate this part in a straight line. Brush it gently and open it in your hand. Curve it and add pins. Try to put the pins a little deeper since we have more work to be done on this part. Add more pins. Use a styling spray to make the lines stand out.
I’ve curved the left side of the hair like this, brought it close to the top of the hair and used a little styling spray. Let’s fix the bottom of this part to the prosthetic hair. Let’s use the rest of the hair and separate it into two parts and do the same as before. Just curve it and add it to the previous layer. I’m going to show you my hand movements. Like this.
My work is done here. I hope this tutorial has been useful to you. To join our classes, please contact the numbers in the description below.