How To: Facial Make-Up Prep & Foundation Tutorial
To get started, spread the MAC Primer oil thoroughly all over the face, then, remove the extra oil off the skin with a Beauty Blender sponge pad. The next step will be the face contouring.
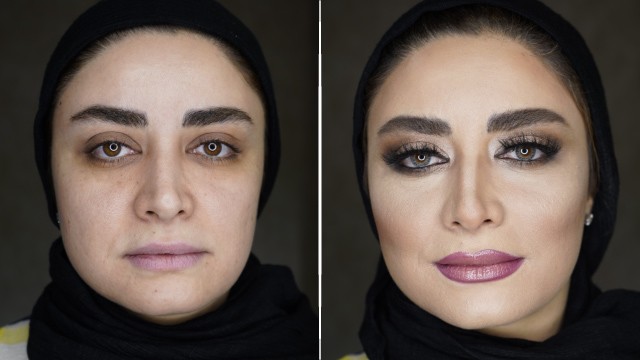
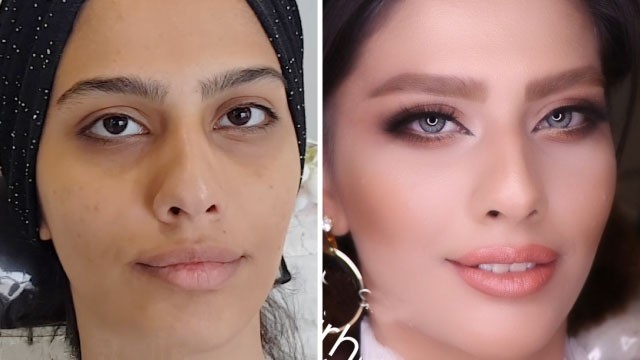
Contouring the face properly, is of utmost importance during a bridal make-up process. The dark contour will be applied to the cheeks, nose bone, lids, hairline and underneath the chin, while other parts including the nose wings, forehead, top of the lips and chin will receive a light contour.
Below, there’s a tutorial containing a full instruction of make-up foundation by Ms Hajar Naseri. Moreover, there are phone numbers provided for those wishing to join her instruction courses.
Instructions:
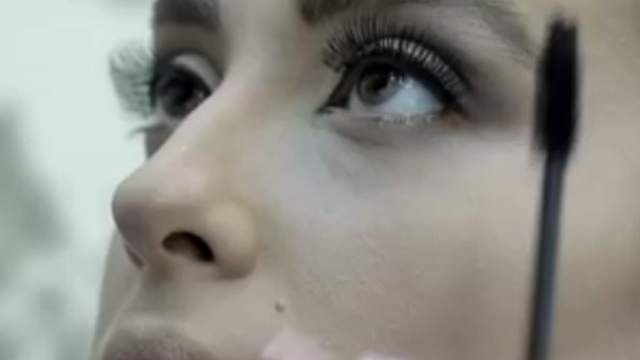
Hello to every one of you followers of Rojelab website, I'm Hajar Naseri, a beautician. Today, I'm gonna show you how to apply a bridal make-up foundation to the face, so keep watching us. first apply the MAC prep+primer oil and spread all over the face. after that, take a piece of pad and dab at the face to make the primer better absorb into the skin. in the next step, take the Anastasia contour kit for the face contouring. put cheek lines on tops of both cheek bones just like what did here. now go for the nose bridge. This client has a small but long nose. I'll make the nose tip a bit darker.
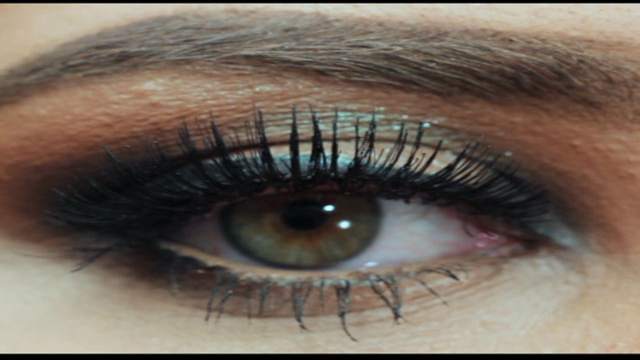
As the nose tip is proportionally bigger than the wings, the nose wings should be a bit lighter to make them stand out more noticeable. make the areas around the wings darker. the chin must be lighter. as well as the nose T bone. now start from tops of the lids and continue to the nose bone. also apply dark colour to the area below the hairline. as well as the edge of jaw bone. apply light colour over the cheeks to make them stand out more. light colour for the forehead. and underneath the brows. and on the lid's surface. and also the part below the dark area on the cheeks to make it more distingushing. well, as you can see. contouring means the juxtaposition of light and dark to form a contrast on the face to be able to show some parts better.
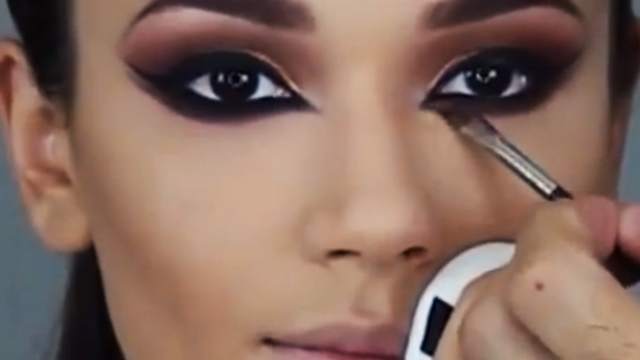
Take the beauty blender sponge pad, wet it with water and use to fade the dark contoured areas on the face. well, we're done with the contour fading. now apply the tarte concealer to underneath the eyes. take the smaller beauty blender pad to fade concealed areas. in the next step, take the MAC FINISHING POWDER to apply to underneath the eyes. Then apply the fixing powder to the lightened areas. after that, take a smaller brush to apply it to the lids. cover thoroughly the lightened areas on the lids, just like this. now take the TOO FACED contour kit and use it for dark areas. the jaw bone, neck, underneath the chin. the nose bone and tops of the lids.
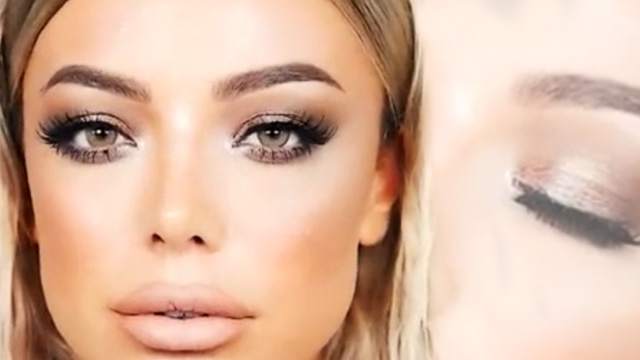
As you already saw, I've faded all these parts and now I'm just drying them with this contour. We did the lightened parts and now we're drying the dark parts with the dry contour. in the next step, I'll highlight the lightened areas with this highlighter pallet. on the nose, on the chin. underneath the brows. now put shadings on the tops of cheeks with the MAC highlighter. well, we put a light make-up on the face after we were done with the contouring. I hope you enjoyed this tutorial. To join our instruction courses, please dial the numbers provided.